The Examiner’s Direct Core Answer: Why Shapes and Colors Matter First
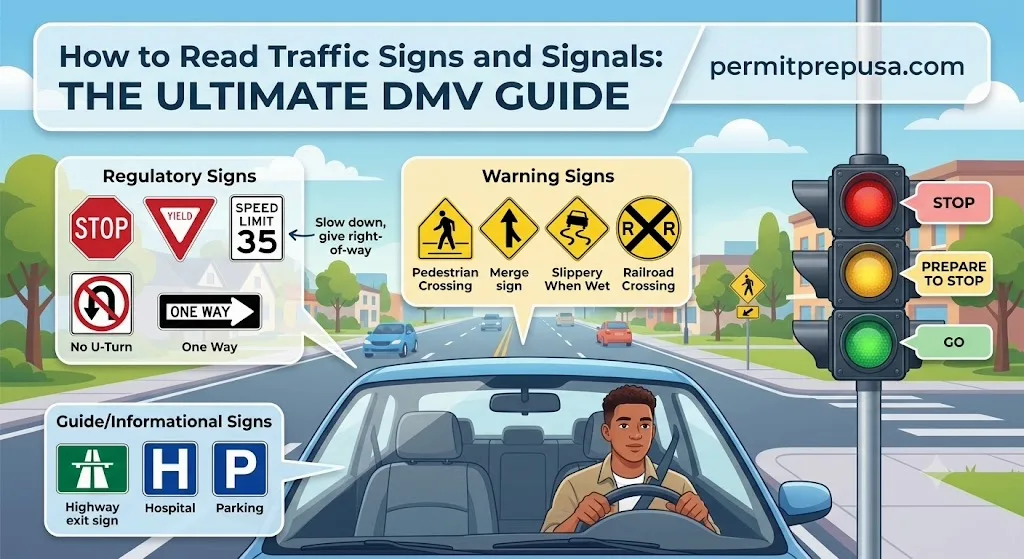
Quick-Answer Box: To read traffic signs and signals effectively for the DMV permit test, you must memorize their Standardized Color and Shape Code System before trying to learn individual symbols. The Department of Motor Vehicles categorizes all environmental indicators by visual metrics: Red always dictates prohibition or stop commands; Yellow warns of upcoming hazards; Green offers directional guidance; and White or Black indicates strict regulatory laws. Structurally, an Octagon is exclusively reserved for stop signs, a Pennant indicates no-passing zones, and an Inverted Triangle demands you yield the right-of-way.
Every single working day at my DMV branch, I witness a recurring tragedy at our computerized testing terminals. An applicant sits down, starts clicking through the randomized exam script, and encounters a series of questions displaying stark geometric profiles or colored templates devoid of text. They freeze, sweat breaks out on their forehead, and within minutes, the terminal logs an automatic lockout failure.
When they walk back to my window holding their failure printout, they almost always offer the exact same complaint: "Examiner, I memorized what the signs say, but the test asked me what a blank blue pentagon or a orange diamond means! That's not fair."
As a veteran DMV examiner, let me clarify an absolute administrative truth: the written knowledge exam is not a simple reading comprehension test. Our agency purposely strips the text off sign graphics within the evaluation loop to ensure you possess a structural, instantaneous comprehension of environmental warnings. When you are traveling at 65 miles per hour on a dark, rain-slicked interstate highway, you do not have the spatial luxury or temporal buffer to read paragraphs of text. You must recognize the meaning of a sign by its silhouette and color palette long before the literal messaging becomes legible to the human eye.
Failing to master these foundational metrics is the primary reason applicants compromise their score cushion. Let's execute an exhaustive, deep-dive architectural breakdown of every traffic sign classification, decode the hidden mathematical parameters of intersection signals, and establish an examiner-level study blueprint that guarantees you will clear these questions on your very first attempt.
The Structural Architecture of Traffic Sign Shapes
The federal government utilizes a highly specific layout blueprint known as the Manual on Uniform Traffic Control Devices (MUTCD). This framework dictates that every geometric shape stamped onto an aluminum road sign carries an unchangeable, legally binding definition. If you do not know these geometries by heart, you are effectively guessing blindly at the kiosk.
The Octagon (8 Sides): Absolute Termination
There is exactly one sign on the entire global roadway system that is allowed to utilize an eight-sided octagonal geometry: the Stop Sign. This design is completely unique so that even if the sign is entirely covered in mud, defaced by vandalism, or viewed from the rear on a single-lane intersection, a driver approaching from any angle can immediately identify the command. You must bring your vehicle to a complete, dead stop behind the solid white limit line—not a rolling crawl, but a full cessation of forward momentum.
The Inverted Triangle (3 Sides Pointing Down): Yield Mandates
Like the octagon, the equilateral triangle pointing downward is strictly reserved for a single operational mandate: the Yield Sign. This geometry commands you to slow down, scan the intersecting traffic pattern, and grant the immediate right-of-way to any pedestrians, cyclists, or vehicles currently occupying the cross-traffic matrix. You are not legally required to execute a complete stop *unless* the current traffic volume creates an immediate hazard profile.
The Pennant (Isosceles Triangle Pointing Horizontally)
This shape represents a massive trap for first-time test takers. A pennant-shaped sign is placed exclusively on the left-hand side of a two-lane roadway, pointing directly across the asphalt. It indicates a No-Passing Zone. Because it sits on the left side of the lane, it remains visible to a driver even if they are traveling directly behind a massive commercial semi-truck that obscures the standard right-hand shoulder signs.
The Pentagon (5 Sides Pointing Up): School Subsystems
A five-sided geometric sign looking like an old schoolhouse indicates an active School Zone or School Crosswalk upcoming. If you see this silhouette, you must immediately prepare your speed bracket to downshift into localized school zone speed limits (typically 15 to 25 miles per hour). Our computerized question banks frequently test whether you can differentiate between a school zone warning and a standard pedestrian crosswalk based strictly on the presence of this five-sided envelope.
The Diamond (4 Equal Sides): Environmental Hazards
The diamond profile is the universal vehicle for Warning Signs. It does not dictate strict regulatory laws, but it notifies your operating profile of an upcoming physical mutation in the road ecosystem. This includes sharp curves, lane reductions, merging traffic patterns, or low-clearance bridges. When you encounter a diamond geometry at our testing terminal, your brain must instantly think: *caution, hazardous layout ahead*.
The Crossbuck (Two Intersecting Diagonal Bars)
This shape consists of two white aluminum slates crossed in an 'X' configuration. It is placed strictly at Railroad Grade Crossings. The crossbuck operates exactly like a yield sign; you must slow your vehicle, listen for audio indicators, and prepare to stop if an active train engine is approaching the crossing track.
The Universal Chromatic Code: Decoding Sign Colors
Color is the first optical signal your brain registers when approaching an environmental indicator. The DMV uses specific color treatments to trigger immediate emotional and psychological responses. Let’s map out the definitive legal meanings of the entire chromatic spectrum used on modern highways.
| Sign Color Template | Primary Administrative and Legal Definition | Real-World Operational Examples |
|---|---|---|
| Solid Red | Prohibition, immediate stop commands, or mandatory exclusion zones. | Stop signs, Yield templates, Do Not Enter banners, Wrong Way markers. |
| Vibrant Yellow | General warning alerts regarding upcoming physical road mutations. | Slippery when wet indicators, sharp turn warnings, pedestrian crossing points. |
| Bright Orange | Temporary construction zones, maintenance alerts, and detour setups. | Road work ahead signs, detours, flagman indicators, lane closure metrics. |
| Pure Green | Directional guidance, mileage markers, and spatial orientation data. | Highway exit numbers, distance charts to upcoming cities, lane selections. |
| Deep Blue | Traveler motorist services, roadside utility data, and medical updates. | Hospital emergency locator signs, gas station icons, rest stop directions. |
| Rustic Brown | Public recreation, state parks, cultural markers, and historic points. | State park entry gates, national forest indicators, historic battlefield markers. |
| White / Black Text | Strict, legally binding statutory regulations and traffic control laws. | Speed limit thresholds, No Left Turn laws, One-Way traffic arrows. |
The Three Master Functional Classifications
When our testing software randomizes your question bank, it groups signs into three distinct operational families. To protect your score margin, you must understand how to classify any sign into its correct family instantly.
1. Regulatory Signs (The Law)
Regulatory signs tell you exactly what you can and cannot do by statutory law. They are essentially the vehicle code printed onto aluminum. Most regulatory signs are vertical rectangles featuring black text on a crisp white background, though the Stop and Yield signs are notable outliers.
Violating a regulatory sign isn't just bad driving technique; it is an immediate moving violation that will result in a law enforcement citation, heavy monetary fines, and an automatic reset of your GDL clock if you are a minor—as we detailed in our guide on learner's permit restrictions every teen should know.
2. Warning Signs (The Hazards)
Warning signs are designed to alert your cognitive processing profile to potential dangers or changes in the upcoming road environment. They are almost universally diamond-shaped and feature bold black symbols on a bright yellow background.
When you see a warning sign, the state expects you to adjust your operational dynamics—usually by easing your foot off the accelerator pedal and increasing your following distance buffer. Common examples include deer crossing placards, advisory speed limits on highway off-ramps, and lane termination graphics.
3. Guide and Informational Signs (The Navigator)
Guide signs carry zero penal weight; they are there strictly to help you navigate from point A to point B without getting lost. They are typically large horizontal rectangles. Green guide signs show highway routes, distances, and exit paths. Blue guide signs point you toward vital motorist services like fuel, food, and lodging. Brown guide signs direct traffic toward public parks and historical points of interest.
Advanced Intersection Signal Mechanics
Reading the road requires more than just cataloging aluminum placards; you must also interpret complex electronic traffic control signals. Many applicants fail the written kiosk because they do not understand the highly specific legal rules governing colored lenses and arrows at major intersections.
The Constant Lenses: Red, Yellow, and Green
A solid green lens means go, but it does not grant you absolute protection. Statutory law states you may proceed *only if the intersection is clear of cross-traffic and pedestrians*. A solid yellow lens means the green interval has terminated, and a red command is imminent. You must bring your vehicle to a safe stop behind the limit line *unless* you are already so close to the intersection that braking hard would cause a rear-end collision. A solid red lens is an absolute command to terminate all forward movement behind the pavement lines.
The Complex Arrow Systems
Arrows introduce the concept of "Protected vs. Unprotected" movements, which represent a significant scoring trap on the exam.
- A Green Arrow: This indicates a completely **Protected Turn**. All conflicting cross-traffic patterns and pedestrian walk signals are held by a solid red phase. You may execute your turn confidently, though you must still yield to any residual vehicles currently clearing the center box.
- A Flashing Yellow Arrow: This indicates an **Unprotected Turn**. Your turn phase is active, but you *do not hold the right-of-way*. You must pull forward into the center box, keep your wheels pointed straight, and wait for a safe gap in oncoming traffic before executing the turn. Failure to yield on a flashing yellow arrow is a leading cause of intersection collisions.
- A Flashing Red Signal: This operates exactly like a physical stop sign. You must bring your vehicle to a complete stop, evaluate the right-of-way matrix, yield to cross-traffic, and proceed only when the lane is entirely clear.
An Examiner's Blueprint for Cracking Sign Questions
Now that you possess the structural data matrix for signs and signals, you must execute a flawless study strategy before booking your counter appointment. Do not try to memorize our database by casually flipping through flashcards. You must build a deep, intuitive cushion of readiness.
First, verify your scheduling parameters by auditing the age gates outlined in our reference guide detailing how old do you have to be to take the permit test. Once you confirm you are legally eligible, download your official state driver's manual and read the entire signs and signals index twice.
Next, do not step into our facility relying on raw common sense. You must understand the true administrative complexity of the exam by reviewing how hard is the DMV permit test. Implement a rigorous, closed-book training regimen using advanced randomized simulators. Practice until you can instantly identify any blank geometric silhouette or color swatch with a consistent 95% threshold, as mapped out in what score do you need to pass the DMV permit test.
If you experience a failure due to a lack of preparation, remember that you will be locked out of our computers and forced to pay administrative re-examination fees—the exact details of which we deconstructed in our foundational reports on can you retake the DMV permit test if you fail and what happens if you fail the DMV permit test. Respect the chromatic code, memorize your geometric definitions, build a massive safety margin during home simulations, and you will easily sail through our testing room on your very first try.
